

Last Updated: November 14, 2026
Quick Summary
Preventing salt corrosion means flushing the raw water cooling system with fresh water after every saltwater trip, before salt can set in the passages. Rinse and dry the engine bay, keep sacrificial anodes matched to your water type and inspected monthly, and coat metal and electrical connections with marine-grade protection.
- Salt crystals stay on metal after water evaporates, pulling moisture from the air and keeping the corrosion reaction alive.
- Run the engine at idle with water flowing for several minutes, then shut off the engine before you cut the water.
- Chalky white residue, flaking paint, pitted aluminum and crust around hose clamps are clear salt corrosion signs.
- Never mix anode alloys on the same engine or drive, and do not paint over anodes or coat them with anti-corrosion spray.
- Rinse the exterior engine surfaces, bilge and fittings with fresh water, then ventilate the engine bay to dry it.
Table of Contents
- Why Salt Corrosion Destroys Marine Engines Faster Than Freshwater Damage
- How to Flush a Boat Engine with Fresh Water After Every Saltwater Trip
- Signs of Salt Corrosion on a Marine Engine You Should Never Ignore
- Choosing and Using a Marine Anti-Corrosion Spray
- Sacrificial Anodes: Selection, Inspection, and Replacement
- Protecting Electrical Connections and the Wiring Harness
- Rinsing, Drying, and Keeping the Engine Bay Clean
- Seasonal Storage and Long-Term Lay-Up for Saltwater Boats
- Add the No Fuss Flush to Your Saltwater Maintenance Routine
- Frequently Asked Questions
Why Salt Corrosion Destroys Marine Engines Faster Than Freshwater Damage
Salt corrosion is the electrochemical breakdown of metal parts caused by prolonged exposure to saltwater and salt-laden air. Left unchecked, it attacks cooling passages, the raw water pump, and electrical grounds long before you notice a performance problem.
Freshwater boats dry out between trips. Saltwater boats do not get that luxury. Salt crystals stay on the metal after the water evaporates, pulling moisture from the air and keeping the corrosion reaction alive around the clock. Add heat from the engine and you accelerate the whole process.
The BoatUS Foundation guide to engine maintenance makes the same point: the damage is cumulative and mostly invisible until it is expensive.
That is the throughline for everything below. Salt corrosion is not a cosmetic issue you deal with in spring. It is a daily chemical process, and the only reliable defense is a routine that removes salt before it can set.
How to Flush a Boat Engine with Fresh Water After Every Saltwater Trip
Flushing a boat engine with fresh water means running clean water through the raw water cooling system until the salt, silt, and grime are pushed out. Do it after every saltwater trip, not once a month. The longer salt sits in the cooling passages, the deeper it bites.
Boater using a garden hose to flush a ski boat engine on a trailer.
The general sequence, whatever your engine type:
- Let the engine cool enough to touch the hose fittings safely.
- Connect your fresh water source to the raw water intake path.
- Start the engine and run it at idle with water flowing.
- Watch the discharge for a steady stream and listen for changes in pitch.
- Run for several minutes, then shut off the engine before you cut the water.
- Disconnect, drain, and dry the fittings.
If you are still deciding what to flush with, our buyer's guide to boat engine flush kits compares the setups side by side.
Flushing a Straight-Drive Inboard Engine
Straight-drive inboards are the easiest engines to flush properly because the raw water pump sits in an accessible spot in the engine compartment. You connect at the pump inlet and skip the trailer-pad gymnastics entirely.
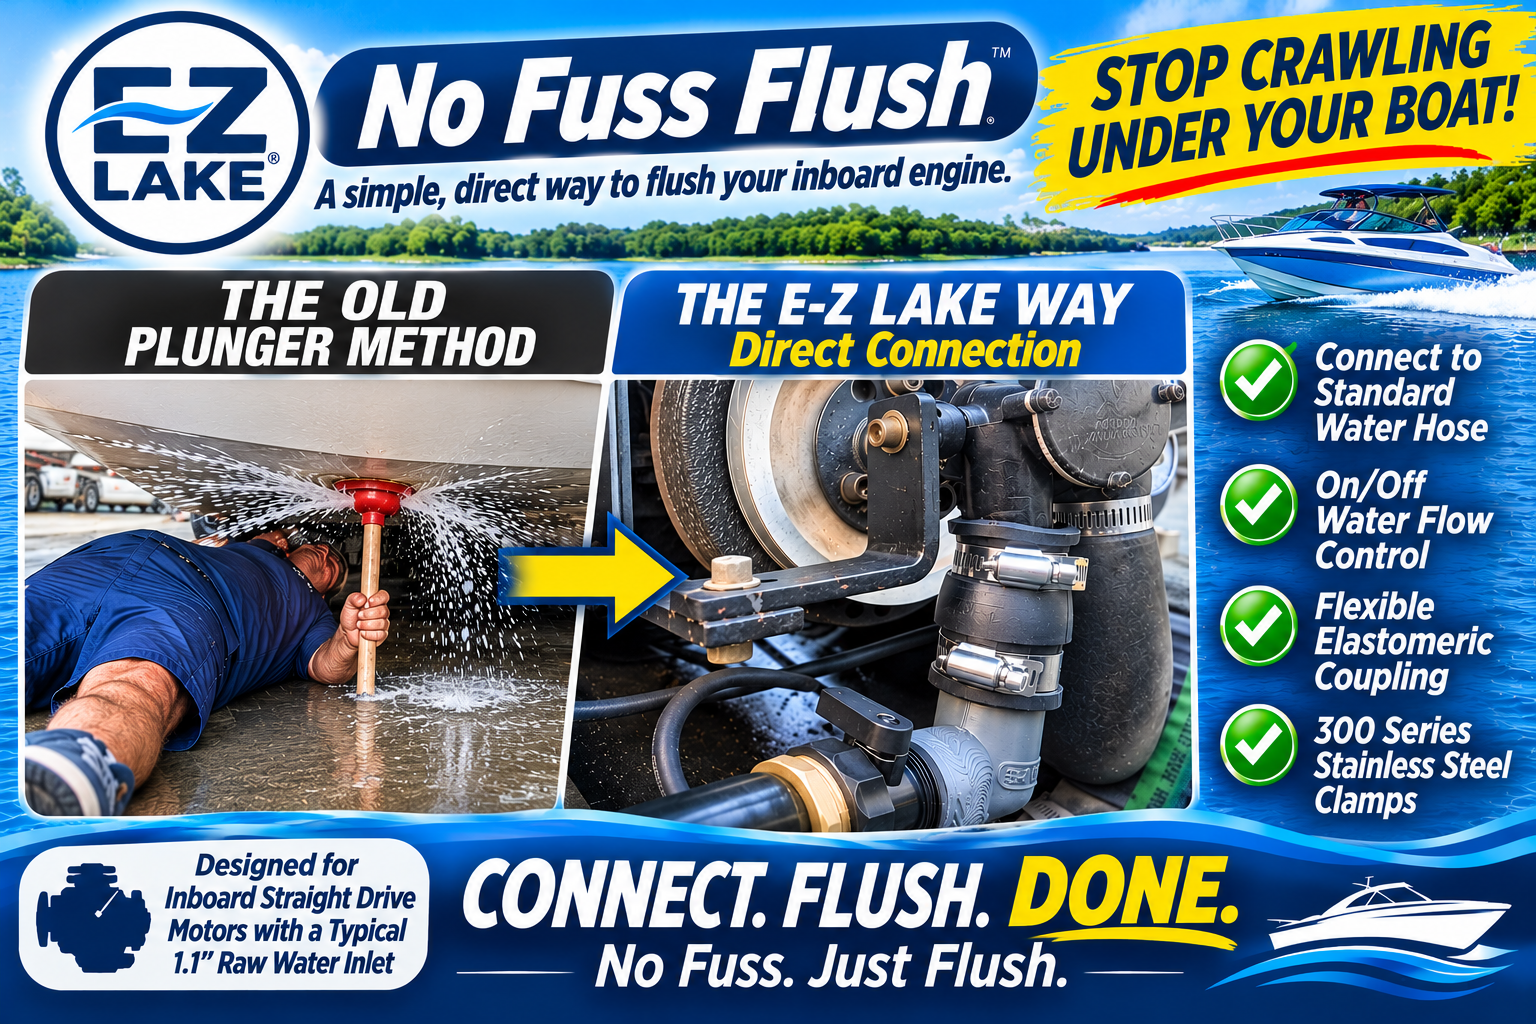
At E-Z LAKE, the No Fuss Flush attaches directly to the raw water pump inlet, so you don't have to crawl under the boat. A common mistake is running the engine before the coupler is fully seated, which lets the hose pop off under vibration.
Flushing an Outboard or Sterndrive
Outboards and sterndrives flush through a dedicated port or a set of muffs over the lower unit intake. The principle is the same, but the failure points differ. Muffs can slip off the intake, and the telltale stream is your only reliable signal that water is actually circulating.
If you are working without a permanent flush system, our article on whether a garden hose is enough to flush a boat engine walks through what actually works.
Flushing a Marine Diesel
Marine diesels often have a raw water pump that is harder to reach, and some have a flush port on the heat exchanger or a dedicated flushing valve. Check your engine manual for the manufacturer-approved method. On many diesels, you can connect a flush hose to the raw water pump inlet or to a flushing port if equipped. Run the engine at idle and watch the exhaust for a steady water flow. Watch out: never run a diesel dry, even briefly; the raw water pump impeller can fail in seconds.
Manufacturer-Specific Cautions
Always follow the engine manufacturer's flushing procedure. Some engines require the engine to be off while flushing, others allow idle running. Some outboards require the engine to be in neutral and the propeller removed or clear. Using the wrong method can damage the water pump or leave salt in the system. When in doubt, consult the manual or a certified technician.
Signs of Salt Corrosion on a Marine Engine You Should Never Ignore
The clearest signs of salt corrosion on a marine engine are chalky white residue on metal, flaking paint around fittings, pitted aluminum surfaces, and a telltale crust around hose clamps and the raw water pump. Any of these means salt has been sitting where it should not be.
A few more that boaters miss:
- Cooling trouble at idle. Rising temperature at low RPM often points to restricted cooling passages.
- Green or white powder on electrical terminals. That is corrosion eating your connection.
- Stiff or seized fasteners. Salt welds threads together over a season.
- Paint bubbling near the block. The metal underneath is already oxidizing.
What most guides miss is that corrosion inside the cooling system rarely shows on the outside first. By the time you see pitting on the block, the passages inside have been degrading for a while.
Choosing and Using a Marine Anti-Corrosion Spray
A marine anti-corrosion spray is a protective coating applied to metal surfaces and electrical connections to block moisture and oxygen from reaching the metal. Used correctly, it buys you a season of protection between applications. Used carelessly, it just makes a mess.
Match the product to the surface:
Surface |
Product Type |
Application |
Frequency |
|---|---|---|---|
Engine block and brackets |
Marine-grade anti-corrosion spray |
Light coat after drying |
Monthly in season |
Electrical terminals |
Dielectric grease or spray |
Thin film on clean terminals |
Every service |
Exterior metal trim |
Protective wax or coating |
Buffed thin layer |
Seasonally |
Moving linkages |
Protective lubricant |
Targeted spray at pivot points |
Monthly |
Clean and dry the surface first. Spraying over salt residue traps the salt against the metal and makes things worse. For a broader look at the tools worth owning, see our practical buying guide for boat engine care tools.
Sacrificial Anodes: Selection, Inspection, and Replacement
Sacrificial anodes are blocks of reactive metal mounted on the engine and drive that corrode in place of your expensive components. They are the cheapest insurance on the boat, and the most commonly neglected.
Choosing the Right Anode Material
The anode alloy must match the water you boat in and the metals in your engine's cooling system. The three common types are zinc, aluminum, and magnesium.
- Zinc is traditional for saltwater and brackish water. It works well but is not recommended for freshwater because it can passivate and stop protecting.
- Aluminum is suitable for both saltwater and freshwater, and is increasingly common as a universal choice. It is often preferred for mixed use and for aluminum engine components.
- Magnesium is for freshwater only. It is more active than zinc or aluminum and protects well in low-conductivity fresh water, but it corrodes too quickly in saltwater.
Never mix anode alloys on the same engine or drive. Mixing can create a galvanic mismatch that accelerates corrosion of the less noble metal. If you are unsure, consult your engine manufacturer's recommendations or a local marine corrosion specialist.
Where Anodes Are Located
Anodes are typically found on the engine block, the heat exchanger, the raw water pump, the transmission, and the propeller shaft or drive. Outboards have anodes on the lower unit and sometimes on the powerhead. Sterndrives have anodes on the drive housing and transom assembly. Inboards may have anodes in the heat exchanger and on the shaft. Check your engine manual for the exact locations and part numbers.
Inspection and Replacement Criteria
Inspect anodes every month in season. An anode that looks white and chalky has stopped working. A missing anode means the corrosion is now eating the next most reactive metal in the circuit, which is usually something you care about.
Do not paint over anodes or coat them with anti-corrosion spray, as that blocks the galvanic circuit.
Protecting Electrical Connections and the Wiring Harness
Electrical corrosion is the quiet killer in a saltwater engine bay. Moisture and salt vapor reach the wiring harness, battery terminals, and ground straps, and resistance climbs. The engine starts rough, gauges flicker, and you chase a fuel problem that was never fuel.
Work through this checklist each season:
- Disconnect battery terminals and clean any white or green buildup
- Apply dielectric grease to every terminal before reconnecting
- Inspect the wiring harness for cracked insulation or green wire
- Check ground straps at the block and the battery
- Seal exposed connectors with marine-grade heat-shrink where possible
- Verify the battery hold-down is tight and the tray is dry
Battery acid residue plus salt spray is a particularly nasty combination. Rinse the battery top with fresh water, dry it, and keep the terminals coated.
Rinsing, Drying, and Keeping the Engine Bay Clean
Rinsing removes the salt. Drying stops it from coming back. Most boaters do the first and skip the second, which is why corrosion returns so fast.
After a saltwater trip, rinse the exterior engine surfaces, the bilge, and every bracket and fitting you can reach with fresh water. Then let the engine bay ventilate. Prop the hatch, run a blower, or park in the shade with airflow through the compartment. Standing moisture in a closed engine bay is a corrosion greenhouse.
Engine-room ventilation matters more than people think. A dry compartment with moving air stays dramatically cleaner than a sealed one that traps condensation overnight. Keep the bilge pumped and free of standing water, and wipe down the engine bay at the end of each month in season.
Seasonal Storage and Long-Term Lay-Up for Saltwater Boats
Lay-up is where good habits pay off or fall apart. A boat stored wet with salt residue for four months will start the next season with problems you cannot see.
A typical lay-up sequence:
- Flush the cooling system thoroughly with fresh water.
- Rinse the entire engine bay and bilge, then dry completely.
- Service or replace anodes before storage, not after.
- Fog or lubricate cylinders per your engine manual.
- Spray metal surfaces with a protective coating.
- Coat electrical terminals and disconnect the battery.
- Leave the engine hatch cracked for ventilation if storage allows.
The American Boat & Yacht Council standards for marine systems are worth reviewing for any work that touches fuel, electrical, or cooling systems. When in doubt on a specific engine, the manufacturer's service manual always wins.
Add the No Fuss Flush to Your Saltwater Maintenance Routine
The routine above works. The hard part is doing it every single trip, especially when you are tired at the dock and the engine hatch is hot.
That is the problem the E-Z LAKE No Fuss Flush was built to solve. It connects directly to the raw water pump inlet, so you flush from inside the boat instead of crawling underneath it, where rocks, mud, and wildlife make the job miserable. The integrated on/off valve gives you control of water flow, there is no permanent installation, and the flexible rubber coupler accommodates inlet connections up to 1.375 inches.
At $34.95, the No Fuss Flush is priced for the job it does. Satisfaction guaranteed. The current model suits straight-drive inboards with accessible raw water pumps, and a future inline version will attach to and become a permanent part of the water intake system.
Salt corrosion does not announce itself. It works quietly until a cooling passage clogs or a ground strap fails at the worst moment. Build the flush-and-dry habit now and your engine will reward you with seasons of dependable service.
Get started with E-Z LAKE and make every saltwater trip end with a clean, fresh-water flush instead of a corrosion countdown.
Frequently Asked Questions
How often should you flush a boat engine after using it in saltwater?
Flush after every saltwater trip, ideally the same day you pull the boat out of the water. Salt crystals begin forming as soon as the water evaporates, and those deposits pull moisture against metal surfaces. If you cannot flush immediately, run the engine on a hose within 24 hours. Boats kept in saltwater slips need the most consistency because the raw-water system stays wet between trips. A short flush after each outing does far more than a long flush once a month.
What are the signs of salt corrosion on a marine engine?
Look for white or greenish powder on metal surfaces, pitting on the block and fittings, crusty buildup around the heat exchanger, and rust streaks under hose clamps. Electrical connections may show green corrosion on the battery terminals or wiring harness. On the water, rising engine temperatures or a weak telltale stream can point to salt buildup in the cooling passages. Catching these signs of salt corrosion early lets you clean and protect the part before it fails.
What is the best marine anti-corrosion spray for an engine?
A marine-grade anti-corrosion spray should leave a protective barrier that displaces moisture and clings to metal without washing off. Look for a product labeled for marine use that is safe on wiring, terminals, and painted surfaces. Apply it to the engine block, battery terminals, and electrical connections after the engine is clean and dry. Reapply at the start of each season and after any heavy salt exposure. Avoid generic lubricants that rinse away quickly in a wet bilge.
Where should you apply corrosion inhibitor on a boat engine?
Apply corrosion inhibitor to the engine block, cylinder heads, and any exposed metal fittings. Coat battery terminals and the wiring harness connectors, since electrical corrosion causes starting and charging problems. Spray hose clamps, anode mounting bolts, and the heat exchanger ends. Keep the spray off belts, pulleys, and intake openings. Clean and dry each surface first so the protective barrier bonds to metal rather than trapping salt residue underneath.
Will the No Fuss Flush work on my inboard engine?
The No Fuss Flush is built for straight-drive inboard engines where the raw water pump inlet is accessible. The rubber coupler fits a typical 1.1-inch raw water inlet and stretches to accommodate connections up to 1.375 inches. At E-Z LAKE, we designed it so you connect the fitting to the raw water pump inlet, attach a garden hose, and control flow with the integrated on/off valve. Check your pump inlet diameter and clearance before ordering.
